COOPERATION MODEL
ARTIFICIAL INTELLIGENCE
PRODUCT ENGINEERING
DevOps & Cloud
LOW-CODE/NO-CODE DEVELOPMENT
INDUSTRY
FRONTEND DEVELOPMENT
CLOUD DEVELOPMENT
MOBILE APP DEVELOPMENT
LOW CODE/ NO CODE DEVELOPMENT
EMERGING TECHNOLOGIES


If you’ve built with React, you’re already halfway to a mobile app. React Native picks up right where React leaves off. React Native isn’t a completely separate ecosystem. It borrows heavily from React’s core principles like component-based structure, reusable logic, and declarative UI, but adapts them for mobile platforms. For teams already working with React, moving to React Native usually feels like a small step, not a big change. But there’s still a bit of a learning curve and a few key choices to make along the way. Here’s a breakdown of what it takes to make the transition from React to React native.
React is a JavaScript library built for building dynamic user interfaces—primarily for the web. React Native, on the other hand, is a framework that allows you to build native mobile applications using JavaScript and React.
What stays the same?
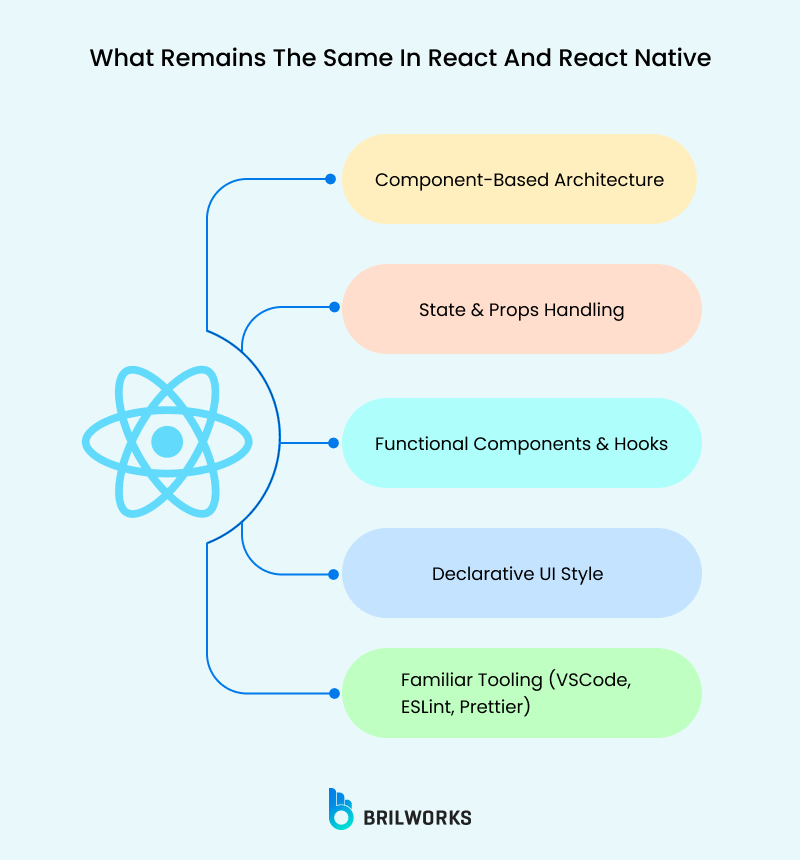
State and props handling
Functional components and hooks
React’s declarative style
Familiar tooling (like VSCode, ESLint, Prettier)
What changes?
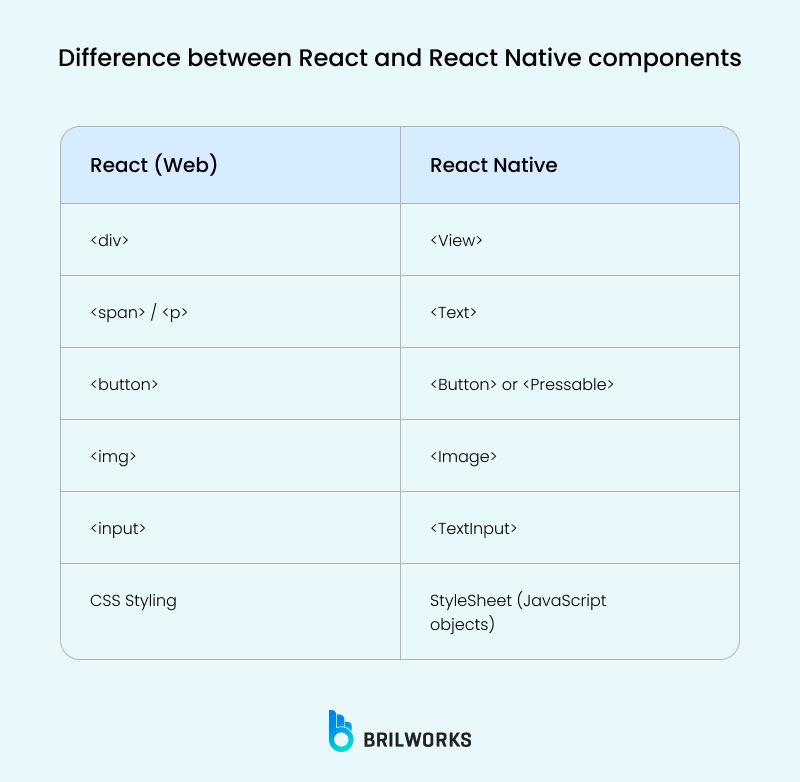
No HTML or CSS. Instead of <div>, <span>, and <p>, you’ll use <View>, <Text>, and <Image>.
No browser DOM. React Native uses a bridge to communicate with native components.
Styling is done using a subset of CSS written in JavaScript objects (think StyleSheet.create).
Navigation, gestures, and animations are handled differently.
React gives you the flexibility of the web, while React Native brings you closer to the hardware-level power of mobile platforms. You’ll have to learn how mobile platforms behave, but the mindset of composition and reusability carries over. Here is a concise summary of React vs React Native to help you understand how a developer can move from React to React Native.
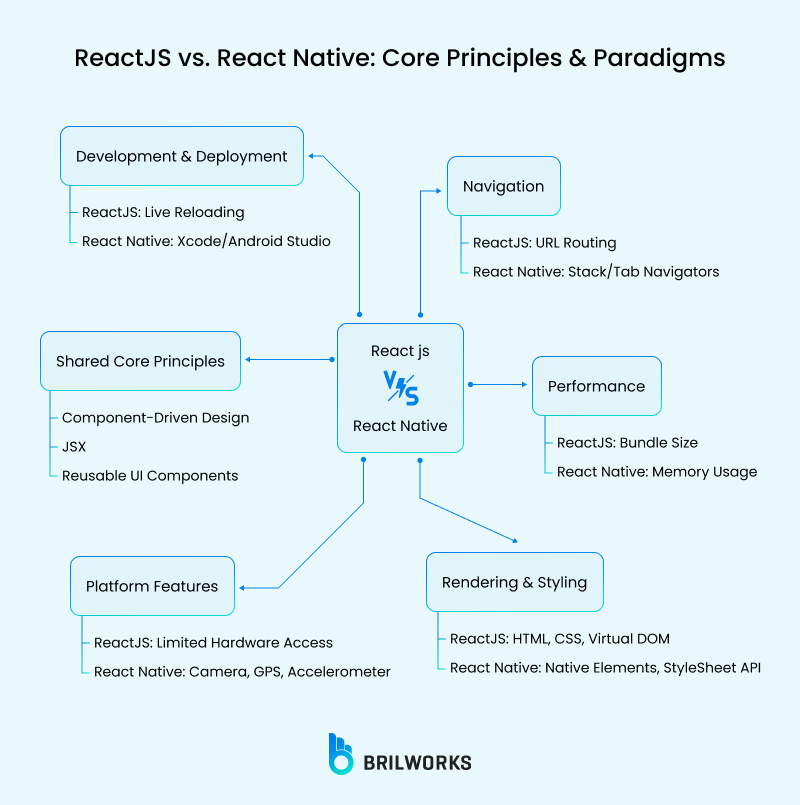
Both ReactJS and React Native share a common foundation in component-driven design and the use of JSX to build UIs.
In ReactJS, you construct web interfaces by combining reusable components, which makes scaling and maintaining large applications more manageable.
React Native extends this approach to mobile app development, allowing you to write components that render to native platform elements. This familiar paradigm helps web developers transition more naturally into mobile development.
ReactJS delivers user interfaces to web browsers where standard web technologies like HTML, CSS, and the virtual DOM play a major role. Styles can be defined in external files or inline, and browsers handle the rendering.
In contrast, React Native uses a JavaScript-based styling system. Instead of traditional CSS, styles are defined through objects and applied via the StyleSheet API. This method offers improved consistency and built-in validation tailored for mobile environments.
While web browsers offer a limited and often inconsistent way to access hardware, React Native gives you direct interaction with the features of mobile devices.
For instance, with React Native, you can integrate native modules to use the device’s camera, GPS, or accelerometer. This access provides more robust capabilities when building mobile apps compared to web-based implementations, where you might have to work around browser restrictions or inconsistent API support.
Navigation is handled quite differently between web and mobile applications. In ReactJS, navigation is typically managed via URL routing using libraries like React Router, leveraging browser history and the address bar.
On mobile, however, navigation is more about managing screen transitions. React Native uses navigators that mimic common mobile patterns—such as stack, tab, or drawer navigators—to create seamless user experiences on smartphones and tablets.
The development workflows diverge as well. In web development with ReactJS, tools like live reloading and browser-based debugging provide immediate feedback and straightforward testing scenarios. Deployment involves building and serving static assets from servers or content delivery networks.
React Native’s ecosystem, while also featuring hot and live reloading, often requires additional debugging tools specific to iOS or Android development, such as Xcode or Android Studio. Furthermore, releasing a mobile app means preparing app binaries and conforming to platform-specific store guidelines—steps not necessary for a web app.
Both platforms emphasize performance, yet the focus areas differ. ReactJS optimization includes reducing bundle size and efficient resource loading, whereas React Native developers must also consider memory usage and the smooth interplay between JavaScript and native code.
Tools and techniques like memoization and lazy loading come into play on both sides, but mobile performance tuning often requires specialized profiling tools.
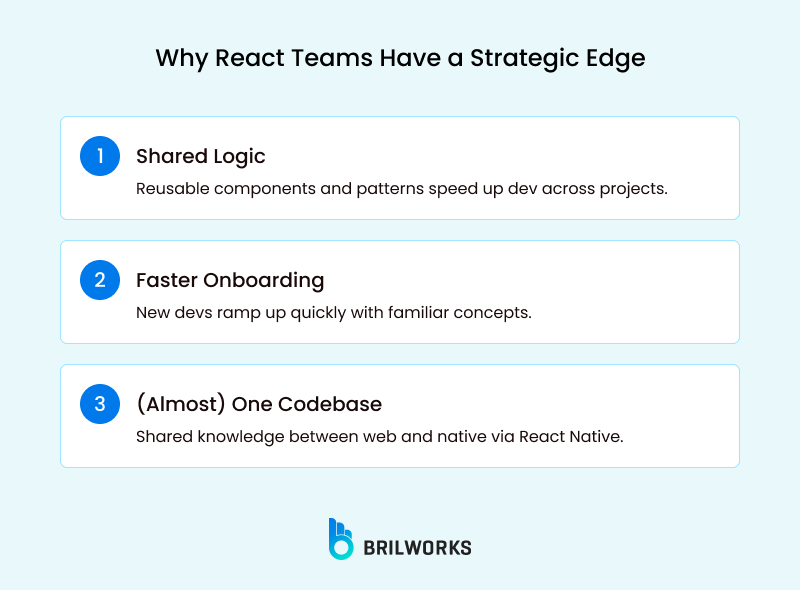
If you’re part of a team that already builds SPAs or dashboards in React, you're closer to shipping mobile apps than you think. Here’s why:
You can reuse large chunks of business logic, API calls, and state management libraries like Redux, Zustand, or even custom hooks. This means less duplication and fewer bugs across platforms.
Your developers are already familiar with React’s principles. They won’t need to learn Swift, Kotlin, or native mobile architectures from scratch. With a few new libraries and a shift in mindset, they can start contributing to mobile features.
Finding React developers is easier than finding native mobile developers. That makes scaling the team faster and more cost-efficient.
While you won’t always be able to share 100% of the code, having shared architecture and UI paradigms brings you closer to a unified codebase. Using packages like Expo and libraries like react-native-web, you can even extend support across the web, iOS, and Android from one place.
These differences aren’t roadblocks, but they are points of adjustment.
So, you're a React developer, and now you want to dive into React Native? Great choice. React Native lets you build real mobile apps using the same React concepts you already know. But there are some differences and tricks you should learn to make the transition smooth.
Below is a section to help you shift from React to React Native without losing your mind. We’ll keep it simple, practical, and developer-friendly.
At their core, React and React Native are built on the same principles but target very different platforms. React renders components to the browser using HTML and CSS. It is directly with the DOM. In contrast, React Native renders native UI elements.
The difference shows up in how you build the UI.
In React,
you'd typically use tags like <div>, <span>, or <p> to create layouts and text.
In React Native,
those are replaced by platform-specific components like <View>, <Text>, and <Button>, which map directly to native mobile elements.
So, while the structure feels familiar and the logic stays the same—using JSX, component-based architecture, and hooks—the output is optimized for the device it's running on.
There are two ways to set up React Native. Beginners can use Expo. It is easy to start.
Expo is like "React Native on training wheels"—super easy to start.
npx create-expo-app MyApp
cd MyApp
npx expo start
If you need full native access, use the CLI:
npx react-native init MyApp
cd MyApp
npx react-native run-android  # or run-ios
React (Web):
<button onClick={() => alert("Clicked!")}>Press Me</button>React Native:
<Button title="Press Me" onPress={() => alert("Clicked!")} />React Native uses JavaScript objects for styling. React Native uses Flexbox for layout (just like CSS Flexbox, but flexDirection: 'column' is default).
import { StyleSheet, View, Text } from 'react-native';

const App = () => {
  return (
    <View style={styles.container}>
      <Text style={styles.text}>Hello React Native!</Text>
    </View>
  );
};

const styles = StyleSheet.create({
  container: {
    flex: 1,
    justifyContent: 'center',
    alignItems: 'center',
  },
  text: {
    fontSize: 20,
    color: 'blue',
  },
});
In React, you use react-router-dom. In React Native, you need a navigation library.
npm install @react-navigation/native @react-navigation/stackimport { NavigationContainer } from '@react-navigation/native';
import { createStackNavigator } from '@react-navigation/stack';
const Stack = createStackNavigator();
function App() {
return (
<NavigationContainer>
<Stack.Navigator>
<Stack.Screen name="Home" component={HomeScreen} />
<Stack.Screen name="Details" component={DetailsScreen} />
</Stack.Navigator>
</NavigationContainer>
);
}
Some components behave differently on iOS and Android. You can adjust them:
import { Platform } from 'react-native';

const styles = StyleSheet.create({
  header: {
    paddingTop: Platform.OS === 'ios' ? 50 : 20,
  },
});
Platform-Specific Files
Button.ios.js (iOS version)
Button.android.js (Android version)
React Native automatically picks the right file.
Unlike web apps, mobile apps need to be built and published.Deploying a React Native app is a different process than deploying a web app. While React (web) projects can be deployed by simply building and uploading files to a server, mobile apps require platform-specific builds and store submissions.
For Android, you’ll first need to generate a keystore for signing the app. After updating the android/app/build.gradle file with the keystore details, you can build a release version of the app by running ./gradlew assembleRelease from the android directory. This will generate an APK or AAB file that’s ready for distribution.
For iOS, the process involves Xcode. Open your project using ios/MyApp.xcworkspace, switch to a generic iOS device, then go to Product → Archive, and follow the steps to distribute the app through Apple’s developer tools. This results in an IPA file that can be submitted to the App Store or shared through TestFlight.
Generate a keystore.
Update android/app/build.gradle.
Run
cd android && ./gradlew assembleReleaseOpen ios/MyApp.xcworkspace in Xcode.
Select Generic iOS Device.
Product → Archive → Distribute App.
Debugging in React Native feels familiar but comes with a few mobile-specific twists. You can still use React DevTools to inspect components and state, just like in a regular React web app.
But for a deeper look into the mobile environment—such as network activity, logs, or even database interactions—Flipper is the go-to tool. It integrates well with React Native and gives you a more complete view of what’s happening under the hood.
You’ll also rely on console.log for basic debugging, but when you need more visibility, console.warn can trigger yellow warning boxes on the screen—handy for catching issues during development.
Some common errors can throw you off if you're new to mobile. For example, the infamous “No bundle URL present” usually means the Metro bundler has crashed or disconnected—restarting it typically solves the problem.
And if you see the dreaded red error screen (often called the Red Screen of Death), it’s usually caused by something simple like a missing import or a typo. Taking a careful look at the error message usually points you in the right direction.
Transitioning from React to React Native opens up exciting opportunities for developers to build powerful mobile apps using familiar concepts. While there are differences—like swapping HTML for native components, adapting to JavaScript-based styling, and mastering mobile navigation—the core React principles of component-driven design and reusable logic remain intact.
This makes the leap manageable for React developers, especially with the support of tools like Expo, React Navigation, and Flipper for debugging.
For teams looking to scale their mobile presence, partnering with a React Native development company can streamline the process, ensuring efficient workflows and high-quality apps across iOS and Android. With a bit of learning and the right resources, React developers can confidently deliver native mobile experiences.
Get In Touch
Contact us for your software development requirements
Get In Touch
Contact us for your software development requirements